
 by
by
Step-by-Step DIY Guide: Install Shed Roof Shingles with Confidence
Have you ever wondered how difficult it would be to add a few shingles to your shed? You’re not by yourself. I’ve witnessed many homeowners begin with the same idea, only to find themselves with warped wood, leaks, or a roof that hardly lasts a season. In actuality, a poor shingle job can cost you money, effort, and peace of mind, despite the shed roof’s seeming simplicity.
For this reason, I always advise clients to treat the roof of their shed the same way they would the roof of their house. If you do it correctly, you won’t have any unexpected leaks when it rains, mildew growing on your tools, or having to spend a weekend redoing work you thought was done. And to be honest, performing it well doesn’t require expensive equipment or years of training; rather, it requires understanding the right sequence, avoiding typical blunders, and paying attention to the little things that most novices miss.
After completing this guide, you will feel confident enough to shingle your shed like an expert. I’ll go over the fundamentals, what materials to choose, common mistakes people make, and how to extend the lifespan of your roof without breaking the bank.
Tools, Materials, and Budgeting Essentials
Let’s discuss what you’ll really need before you go up that shed. The number of times I’ve witnessed someone begin a job just to abandon it in the middle because they forgot something as basic as roofing cement or chalk line is too numerous to count. Believe me, the entire process goes more smoothly if you have everything ready before you start.
I never begin without the following essential toolkit:
-
Hammer
(or roofing nail gun if you have one) -
Roofing nails
corrosion-resistant are best -
Chalk line
for keeping your rows straight -
Utility knife
to cut shingles cleanly -
Work gloves
your hands will thank you later
Additionally, don’t overlook these necessities for materials:
-
Shingles
(asphalt shingles are the go-to for sheds) -
Underlayment
acts as a water-resistant layer -
Drip edge
protects the wood along the edges -
Roofing cement
for sealing exposed spots
Let’s talk about the budget now. Generally speaking, a do-it-yourself shed roofing project costs between $150 and $300, depending on the size of the shed and the type of shingles you select. You should anticipate being nearer the low end for a tiny 8-10 shed. The price increases if you choose premium shingles or if your shed is larger.Forbes Home provides a more comprehensive estimate of roofing expenses, which is consistent with what I’ve observed in actual projects.
Why this is important to you: knowing these things in advance prevents unforeseen costs halfway through and last-minute hardware shop trips.
Safety Precautions Before You Begin
I am aware that it is only a shed. However, falling even six or seven feet can send you to the emergency room. When my neighbors disregarded safety on a shed roof, the results weren’t good. Therefore, let’s discuss how you will defend yourself before we even discuss shingles.
What I always advise is as follows:
-
Set your ladder correctly
: firm, level ground and extend it at least three feet above the roof edge. -
Wear the right shoes
: non-slip soles make a huge difference when you re balancing on asphalt shingles. -
Gloves and eye protection
: not just for comfort nails and sharp edges can cut you fast. -
Pick the right weather
: a dry, calm day is your best friend. Skip windy days or anything damp.
Why this matters to you: You’ll be able to concentrate better on the work at hand and complete the project without worrying about mishaps if you’re comfortable with your safety arrangement.
Step 1 Install the Drip Edge and Underlayment
The drip edge is among the most easily overlooked features. The truth is that without it, water would seep beneath your shingles, seep into the wood, and gradually erode the shed’s borders. I’ve saw folks spend hundreds of dollars repairing a shed that could have been secured with a simple $10 metal piece.
How to do it correctly:
- Nail the drip edge snugly along the roof edges.
- Make sure it hangs slightly over the fascia so water rolls off cleanly.
- Once that s set, roll out the underlayment across the roof.
- Overlap each layer by 4 6 inches so water never finds a direct path in.
- Snap a chalk line before laying rolls to keep everything straight.
The basis of your roof is this phase. Everything else you do is useless if water gets underneath here.
Step 2 Create a Solid Starter Strip
The first line of defense against leaks on your roof is the starting strip. If you neglect it, rain will eventually find its way beneath that initial row, and you’ll have to fix leaks before the season is up.
Tips for best practices:
- Cut standard shingles to size or buy pre-made starter shingles.
- Lay them flush with the edge of the roof no big overhangs and no gaps.
- Double-check alignment because every row after this will follow.
In the absence of a starting strip, water seeps in at the bottom row’s weakest point.
Step 3 Lay the First Course of Shingles
Consider this as establishing the scene. Your roof’s first course determines whether it appears tidy and professional or crooked and careless. The easiest way for me to stay straight is to start by snapping a chalk line.
Important points to keep in mind:
- Place shingles so they cover the starter strip completely.
- Keep edges aligned with the chalk line you snapped earlier.
- Double-check before nailing fixing the first course later is a nightmare.
Every row above it will have the same tilt if the initial row is crooked.
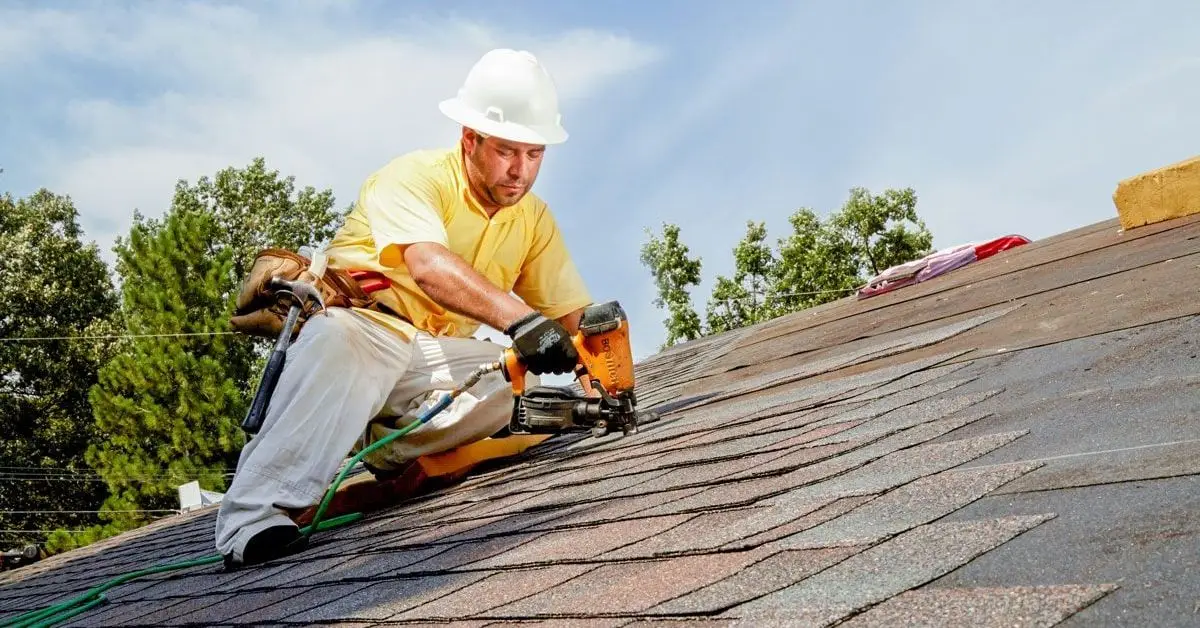
Step 4 Nail Shingles in the Correct Position
This is where novices typically make mistakes. Although nailing may appear simple, improper placement can result in leaks, loose shingles, or even wind damage.
I abide by the following nail rules:
-
Use
4 6 nails per shingle
depending on wind exposure. - Place nails just above the tar line (that sticky strip that seals shingles in heat).
- Don t overdrive the nails it can tear through shingles.
- Don t underdrive either raised nails stop shingles from sealing.
This Old House claims that one of the main distinctions between a strong roof and one that leaks is proper nailing.
Strong, weatherproof, and long-lasting shed roofs are the result of proper nailing.
Step 5 Continue Layering With a Staggered Pattern
It’s a mistake if you’ve ever seen a roof with vertical lines aligning row after row. Water will flow directly into the shed along those lines. Because of this, staggered layering cannot be compromised.
How to properly stagger:
- Start each new row with a half shingle to offset joints.
- Make sure seams don t line up with the row below.
- Keep overlaps consistent to block wind-driven rain.
In addition to giving the roof a polished appearance, staggering strengthens its resistance to leaks.
Step 6 Finish With Ridge Cap Shingles
Your shed’s weak spot is the ridge at the very top. Water and wind will infiltrate without ridge tops. This final touch is crucial because of this.
Do-it-yourself ridge cap method:
- Cut shingles into 3 equal parts to create ridge caps.
- Place them along the ridge, overlapping each piece.
- Always install facing away from the wind so they don t peel up.
- Secure with nails and seal exposed spots with roofing cement.
A roof without ridge caps is similar to a garment that isn’t fastened; it looks good but doesn’t offer any protection.
Step 7 Inspect and Seal for Waterproofing
Do yourself a favor and check everything before packing up your tools. It can save you weeks of frustration later and just takes a few minutes.
Last check list:
- Walk around the shed and spot crooked shingles or gaps.
- Seal every exposed nail head with roofing cement.
- Run a garden hose over the roof to check for leaks.
You can rest easy after taking this final step. You will know that your shed roof is capable of withstanding the first storm. If you want to go one step further, check out these10 easy ways to winter-proof your home without hiring a proto make sure your entire property stays safe during the cold months.
Beginner Mistakes to Avoid
To be honest, most do-it-yourself shed roofs don’t fail because the shingles were purchased incorrectly. Little errors compound to cause them to fail. The good news? 90% of the issues that novices encounter can be avoided if you are aware of these beforehand.
The mistakes I notice most frequently are as follows:
-
Crooked rows:
If your first row isn t straight, every single row after that will look uneven. Always use a chalk line. -
Wrong overlaps:
Too much overlap wastes shingles, too little leaves gaps for leaks. Keep it consistent. -
Over or under-nailing:
Hammer too hard and you tear the shingle, hammer too soft and it won t seal properly. -
Skipping the underlayment:
This is a big one. Without underlayment, moisture can sneak in and rot your roof deck. -
No overhang at the edges:
Shingles should hang slightly over the edge to let water run off. Flush shingles send water straight into the wood. During winter, this mistake often leads to ice buildup, so it s worth reading theseexpert tips to avoid ice dams and leaks
to protect both your shed and your house.
If you want proof, evenWikiHow s roofing guidewarns about underlayment and alignment errors being the biggest beginner mistakes. And from what I ve seen in real projects, they re absolutely right.
Knowing these mistakes ahead of time is like having a safety net you ll save money, avoid rework, and get a roof that lasts years longer.
Pro Tips for Long Roof Life
Getting your shed roof done is one thing. Making sure it lasts for years is another. I ve worked on plenty of sheds where the shingles themselves were fine but the owner never cleaned the gutters or checked the roof, and small issues turned into big problems.
Here are a few habits I recommend if you want your shed roof to go the distance:
-
Keep gutters clean:
Blocked gutters push water back onto the shingles and shorten their life. -
Do an annual inspection:
Once a year, climb up and check for loose shingles, cracked sealant, or nail pops. A quick repair now saves a full redo later. -
Use reflective shingles if possible:
They bounce off heat, keeping the shed cooler in summer and extending shingle lifespan. And if you live in a fire-prone area, don t miss thesefive must-do steps to wildfire-proof your home before it s too late
for extra peace of mind.
These little steps don t just protect your roof they protect your time, your tools, and your wallet. And most competitors never mention them.
Conclusion Build It Once, Build It Right
At the end of the day, roofing your shed isn t just about getting through the project it s about building something that lasts. With the right foundation, straight lines, solid nailing, and those finishing touches, you ll have a shed roof that s strong, durable, and ready for whatever the weather throws at it.
If you ve tried roofing before or if you re planning your first project I d love to hear your experience. Drop your thoughts and questions in the comments below.
And if you re looking for more practical home improvement tips and step-by-step guides, don t forget to visitBuild Like Newfor more.
Disclaimer: This guide is for general DIY purposes only. For large, complex, or unsafe roofing projects, always consult a licensed professional.
Contents Table
-
Tools, Materials, and Budgeting Essentials
-
Safety Precautions Before You Begin
-
Step 1 Install the Drip Edge and Underlayment
-
Step 2 Create a Solid Starter Strip
-
Step 3 Lay the First Course of Shingles
-
Step 4 Nail Shingles in the Correct Position
-
Step 5 Continue Layering With a Staggered Pattern
-
Step 6 Finish With Ridge Cap Shingles
-
Step 7 Inspect and Seal for Waterproofing
-
Beginner Mistakes to Avoid
-
Pro Tips for Long Roof Life
-
Conclusion Build It Once, Build It Right